One topic that has been on my mind a great deal the last few months is "minimalism." No, I'm not referring to the decorating aesthetic of bare white walls and spartan furnishings. I am talking about living with less Stuff, paring down your life to the essentials, owning (and doing) only those things that are useful and bring you joy. This philosophy is not about organizing your clutter, but rather letting go of it! How many plates does one family need? Why are there boxes and boxes of STUFF stored in the attic untouched for months, even years? Why do we keep closets full of clothes that we don't like and never wear? Why are we constantly running from one activity to another, never slowing down to just "be" and enjoy the moment?
All this Stuff & busyness weighs us down!
So, hubby and I determined to do something about it. Enough is enough!
First, let me clarify: we are not hoarders. You would not have ever walked into our home and thought to yourself, "Wow, they have a problem. It's time for an intervention." It was usually reasonably tidy and comfortable. However, we had six 72-inch tall bookshelves packed with books, plus 3 more bookshelves full of my crafting supplies. Our closets were all filled. The attic was also full. I had to store things on top of the refrigerator because my kitchen cabinets had no more room. Not being able to find something we really wanted was a too common occurrence. Getting the vacuum out of the coat closet was a pain due to the amount of Stuff stored all around it...
You get the picture? Our Stuff was not serving us. In fact, it was frequently impeding us from living joyfully and causing frustration.
So, the Great De-Stashing began. We sorted and tossed and donated piles and piles of Stuff. And then we did it some more. Hundreds of books, bags of clothes, unused housewares, furniture we never liked, all removed from our home. Each time we let go, the easier it became to let go of more. The thrill of loading my car full and hauling it off was even more exciting than the thrill I used to get shopping for something new. In fact, shopping and buying more Stuff is the LAST thing I want to do these days. And you know what? So far, I have not missed one single item I have let go of. Literally thousands of pounds of Stuff has left our home, and still there is more to go!
And now, you may be asking yourself, "So what about that 'Kick-In-The-Pants' mentioned in the title of this post?" Well, as I write this, my hubby is in the middle of a job interview...in another town. If he lands this job, it would not only necessitate relocating, but it will surely require serious downsizing as the cost of housing in the new community is significantly higher than where we currently live. In fact, the four of us could very likely go from living in a 2,000 + square foot, 5-bedroom house to a 2-bedroom apartment with less than half our current square footage!!!
How's that for a kick in the pants?
Stay tuned for more posts discussing minimalism, including some how-to's and recommended resources.
Tuesday, July 31, 2012

Wednesday, July 25, 2012
Mindless Mindful Running
There are many people who run to clear their minds. It can be a very zen-like experience. I remember that feeling well, getting in "the zone," mesmerized by the rhythm of your feet moving...but that was a long time ago for me when I was much younger. Starting over years and years later, running barefoot, trying to have correct form and avoid injury has made my runs anything but "mindless!" Instead, I find my mind constantly engaged, focusing on the terrain and my body to make sure I don't hurt myself. The entire time there is an internal conversation going something like this...
"Mind your posture. No slumping. Keep your core strong!"
"Careful with your stride...quicker and shorter."
"Drive your knees up a little more. No shuffling!"
"Quiet, gentle contact with the ground. No pounding!"
"Don't push so hard. This isn't a race."
"I know this feels good, but it's time to take a walk-break. Remember, you are in this for the long haul and don't want injuries."
"Stop worrying about what those people must think of you and your bare feet."
"Make an adjustment on your foot strike, I can feel some friction. No blisters allowed!"
"For goodness sake, smile! This is supposed to be fun, not work!"
Now let me say, I'm not complaining. I thoroughly enjoy my little runs. I am trying to accept it for what it is at this moment. Instead of bemoaning the fact that I can not skip out and run miles and miles effortlessly, I try to find joy in each step of my journey towards that goal. It is a great pleasure to get outside in nature, feel the various forms of ground (concrete, pavement, sand, mud, grass) under my feet, and work my muscles. Right now, running for me is anything but tuning out. It is much more a tuning IN. No distractions like an ipod or monitoring device checking my heart rate and time. No padded shoes to cushion and insulate my feet. Just me listening to my body and trying to experience and enjoy the world around me.
"Mind your posture. No slumping. Keep your core strong!"
"Careful with your stride...quicker and shorter."
"Drive your knees up a little more. No shuffling!"
"Quiet, gentle contact with the ground. No pounding!"
"Don't push so hard. This isn't a race."
"I know this feels good, but it's time to take a walk-break. Remember, you are in this for the long haul and don't want injuries."
"Stop worrying about what those people must think of you and your bare feet."
"Make an adjustment on your foot strike, I can feel some friction. No blisters allowed!"
"For goodness sake, smile! This is supposed to be fun, not work!"
Now let me say, I'm not complaining. I thoroughly enjoy my little runs. I am trying to accept it for what it is at this moment. Instead of bemoaning the fact that I can not skip out and run miles and miles effortlessly, I try to find joy in each step of my journey towards that goal. It is a great pleasure to get outside in nature, feel the various forms of ground (concrete, pavement, sand, mud, grass) under my feet, and work my muscles. Right now, running for me is anything but tuning out. It is much more a tuning IN. No distractions like an ipod or monitoring device checking my heart rate and time. No padded shoes to cushion and insulate my feet. Just me listening to my body and trying to experience and enjoy the world around me.
Tuesday, July 10, 2012
My First BAREFOOT Run
The following is something I wrote on a barefoot running forum about my first barefoot run last week:
Let me explain something. I am NOT a runner. I used to run years and years ago. I loved to run. But running did not love me. Even in my teenage years, my track and cross-country career was riddled with shin splints and stress fractures. As an adult, every time I tried to pick running back up, the same old injuries would start to return. It was so frustrating. No shoe or insert seemed to help. I was beginning to believe that these flat feet just weren't made for running. So I walk...a lot! (And wish I were running.)
I've been reading about barefoot running. I've been walking barefoot as much as I possibly can around the house, yard, and during my frequent visits to the neighbor's house across the street. (Yeah, that may not sound impressive, but pavement gets pretty hot when the heat index is 112 degrees outside!) I've been searching and shopping for the "right" minimalist shoes so I could get started...but that idea seemed to be nixed by several of the more experienced barefoot runners I read. I still want some minimalist shoes...but I'll add those once I'm sure my form is good.
So today (July 3) was the day. I was ready to take the plunge. Once the afternoon sun had moved down a bit and it cooled to a nice, chilly 91 degrees or so I donned my flip flops, grabbed my neighbor's big dog, (bad guys don't bother ladies with big dogs as quickly as a lady alone,) and I headed for the paved greenway just a few blocks from my house. Once I was off the very bumpy, gravelly pavement that is in front of my house, I slipped off my flip flops and tentatively started to walk. It felt good! Then I broke into a run. It felt great! Even though the path was littered with debris (twigs, acorns, etc.) from the big storm a few days ago, my feet didn't hurt. Equally amazing to me was that I didn't feel as winded or wiped out as I have gotten lately when I've tried to add some running into my walk. It felt easy and natural. I did several intervals of running, forcing myself to stop and walk because I am determined to avoid injury!
I can not believe that I did nearly a full 2 miles walking and running barefoot! Needless to say I am quite thrilled and hope this is the beginning of a new journey for me and my feet!
Tuesday, July 03, 2012
K.I.S.S
You know the old saying: Keep It Simple Stupid. Okay, maybe it's not the most polite way to make a point, but it does make a point! Since I last blogged I have been reading a lot about the idea of simplicity and minimalism. Am I planning on joining a Buddhist monastery and culling my possessions to only one robe and one bowl? Goodness, no! However, I can honestly say that THOUSANDS of pounds of STUFF has left our home and it feels so good! I have been going through closets and drawers and the attic and letting go of all that STUFF that we don't use or love. It is an ongoing process, but this is my goal. Eventually I would like to say that every single thing I own is either useful and/or brings me joy. If time permits, I will write more here about my journey.
Tuesday, February 14, 2012
Latest Venture

Hello! Long time, no blog!
I've been a busy little bee, although I haven't made time to write about it! One thing that has kept me hopping is that I recently opened an Etsy shop. (Thanksgiving, 2011)
I've been a busy little bee, although I haven't made time to write about it! One thing that has kept me hopping is that I recently opened an Etsy shop. (Thanksgiving, 2011)

I am selling some hair sticks and jewelry.

But the best-sellers have been my fiber-arts accessories, like the drawstring project bags.


And I've made some zippered box bags in various sizes.


There are no exposed seams in ANY of my bags, even the box bags. Here's one turned completely inside out!

Many of my drawstring bags are completely reversible.


Many of my drawstring bags are completely reversible.


For folks on a tight budget, I offer a K.I.S.S. (Keep It Simple, Sweetie) Bag which is also fully reversible.

There are snag-free beaded stitch markers in fun shapes too.


Feel free to drop by the shop and look around any time! www.MicheleStitches.etsy.com
If you find something you like in the "sold" section, feel free to contact me.
I have been doing a lot of custom orders and I am happy to reproduce designs whenever materials are available to do so!

There are snag-free beaded stitch markers in fun shapes too.


Feel free to drop by the shop and look around any time! www.MicheleStitches.etsy.com
If you find something you like in the "sold" section, feel free to contact me.
I have been doing a lot of custom orders and I am happy to reproduce designs whenever materials are available to do so!
Wednesday, September 14, 2011
Blogging and Bombing
I haven't blogged in a long time. No excuses. You've heard them all.
Instead I'll show you a few projects I've made in the last several months.
Socks (pattern and yarn details here):

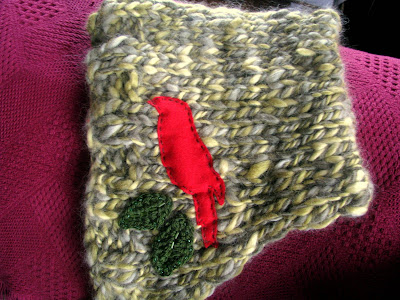
A hat made with chunky Rowan wool and embellished with felt bird, crocheted leaves and some beads (nitty gritty details here):
Up close to see the beading better:

Cheerfully modeled by my little girl.

YARN BOMB!!!
You may be asking, "What's a yarn bomb?"
Also known as yarn storming, guerrilla knitting, and knitting graffiti, yarn bombing is a type of street art which involves knitted or crocheted work embellishing the environment around you. It is not an act of vandalism. It is an attempt to encourage folks to see their environment in a different light and to add a little whimsy to our everyday, humdrum existence.
I had never participated in any form of yarn storming, but one of the Nerd Wars challenges for the month of March encouraged such nefarious activities.
First, to find a good spot.
 Aha! That sad looking mailbox at our local Music Academy looked like it could use some perking up. Bonus points for the fact that it sits across the street from a middle school where there is plenty of traffic.
Next, I armed myself with crochet hook and lots of colorful acrylic yarn and started hooking.
Then, it was time to practice my nefarious ninja skills.


When yarn storming on private property it is always a good idea to get permission first, but if you don't want to ruin the surprise, leaving a note explaining your art is an acceptable option.

Give a quick glance to admire your handiwork then quietly disappear into the shadows like any self-respecting ninja would do.
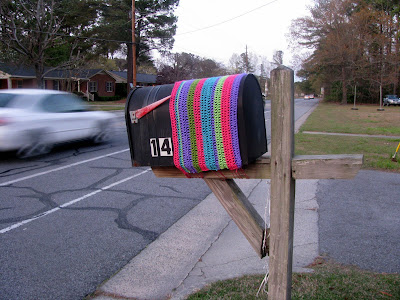
Find yourself grinning with glee every time you pass that way again and spot your colorful addition to the community.
(Yes, over 5 months later, it's STILL there!!!)
And that, my dear friends, brings you up to date with my crafting deeds through the month of March. Stay tuned for more to come!
Look, Rae! I blogged!
Instead I'll show you a few projects I've made in the last several months.
Socks (pattern and yarn details here):
A hat made with chunky Rowan wool and embellished with felt bird, crocheted leaves and some beads (nitty gritty details here):

Up close to see the beading better:

Cheerfully modeled by my little girl.

YARN BOMB!!!
You may be asking, "What's a yarn bomb?"
Also known as yarn storming, guerrilla knitting, and knitting graffiti, yarn bombing is a type of street art which involves knitted or crocheted work embellishing the environment around you. It is not an act of vandalism. It is an attempt to encourage folks to see their environment in a different light and to add a little whimsy to our everyday, humdrum existence.
I had never participated in any form of yarn storming, but one of the Nerd Wars challenges for the month of March encouraged such nefarious activities.
First, to find a good spot.
 Aha! That sad looking mailbox at our local Music Academy looked like it could use some perking up. Bonus points for the fact that it sits across the street from a middle school where there is plenty of traffic.
Next, I armed myself with crochet hook and lots of colorful acrylic yarn and started hooking.
Then, it was time to practice my nefarious ninja skills.
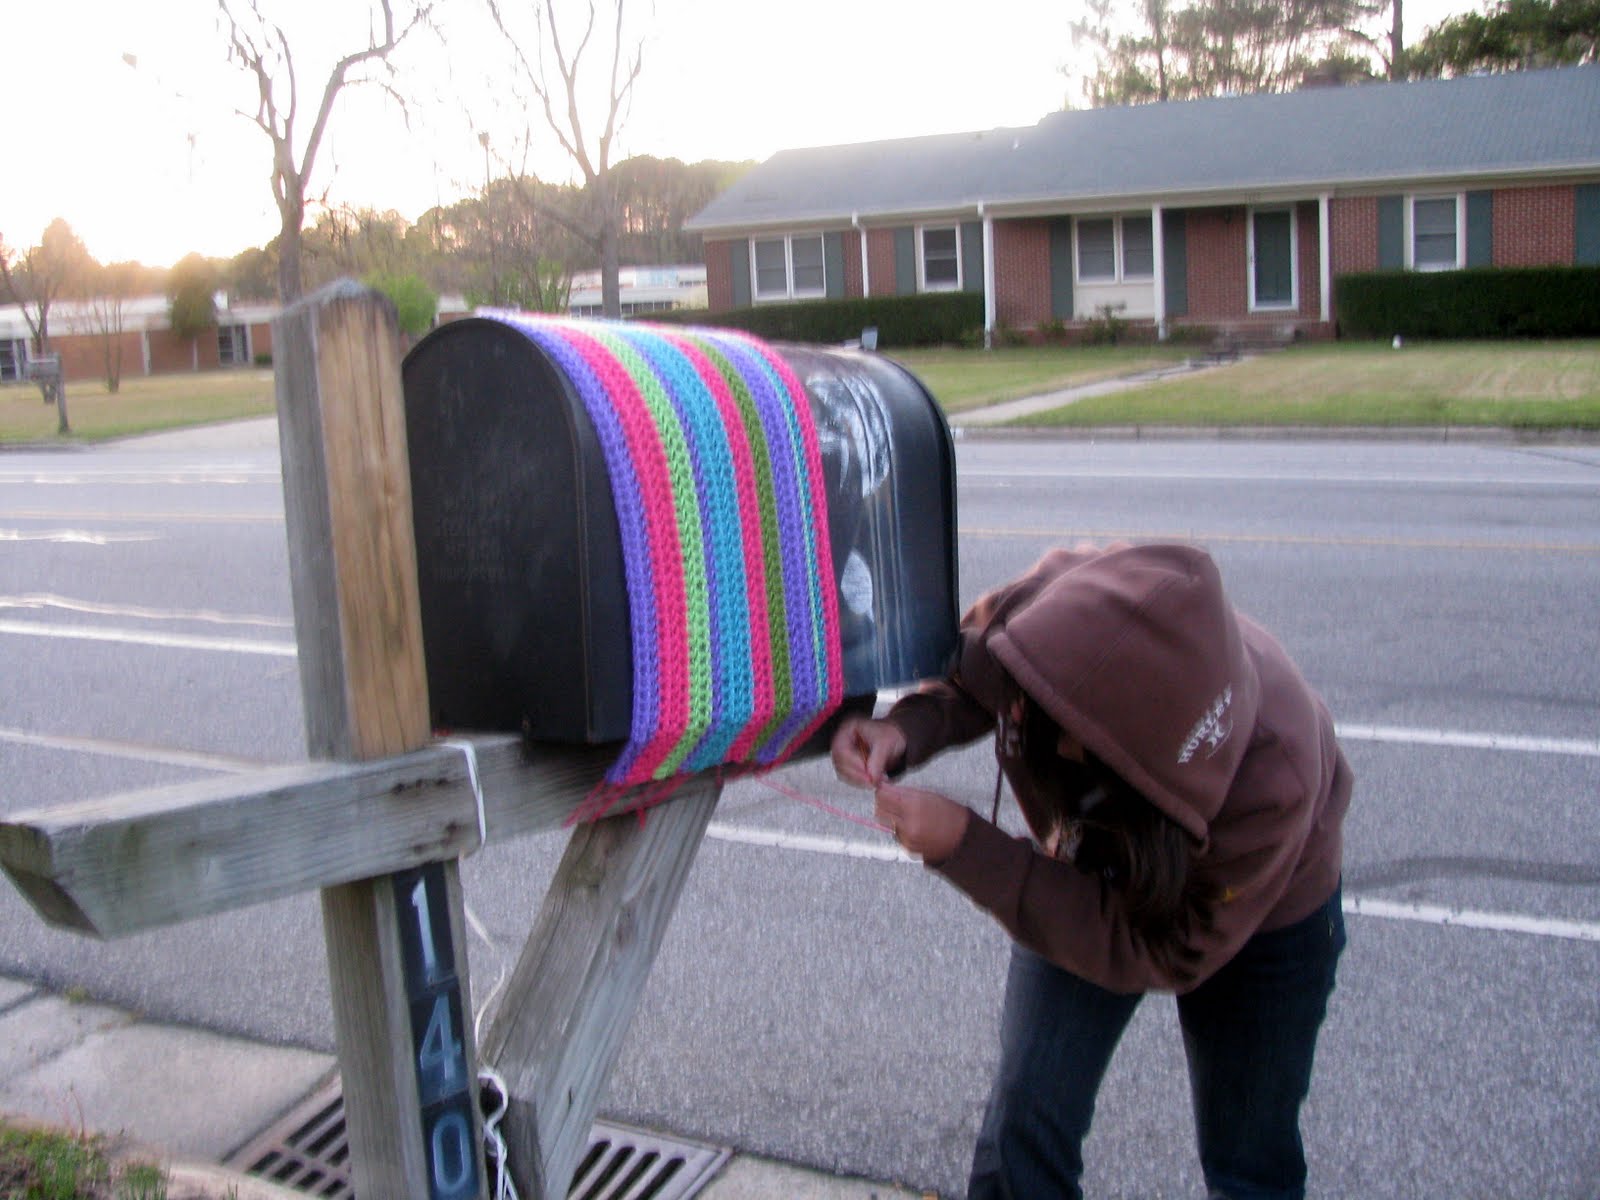

When yarn storming on private property it is always a good idea to get permission first, but if you don't want to ruin the surprise, leaving a note explaining your art is an acceptable option.

Give a quick glance to admire your handiwork then quietly disappear into the shadows like any self-respecting ninja would do.
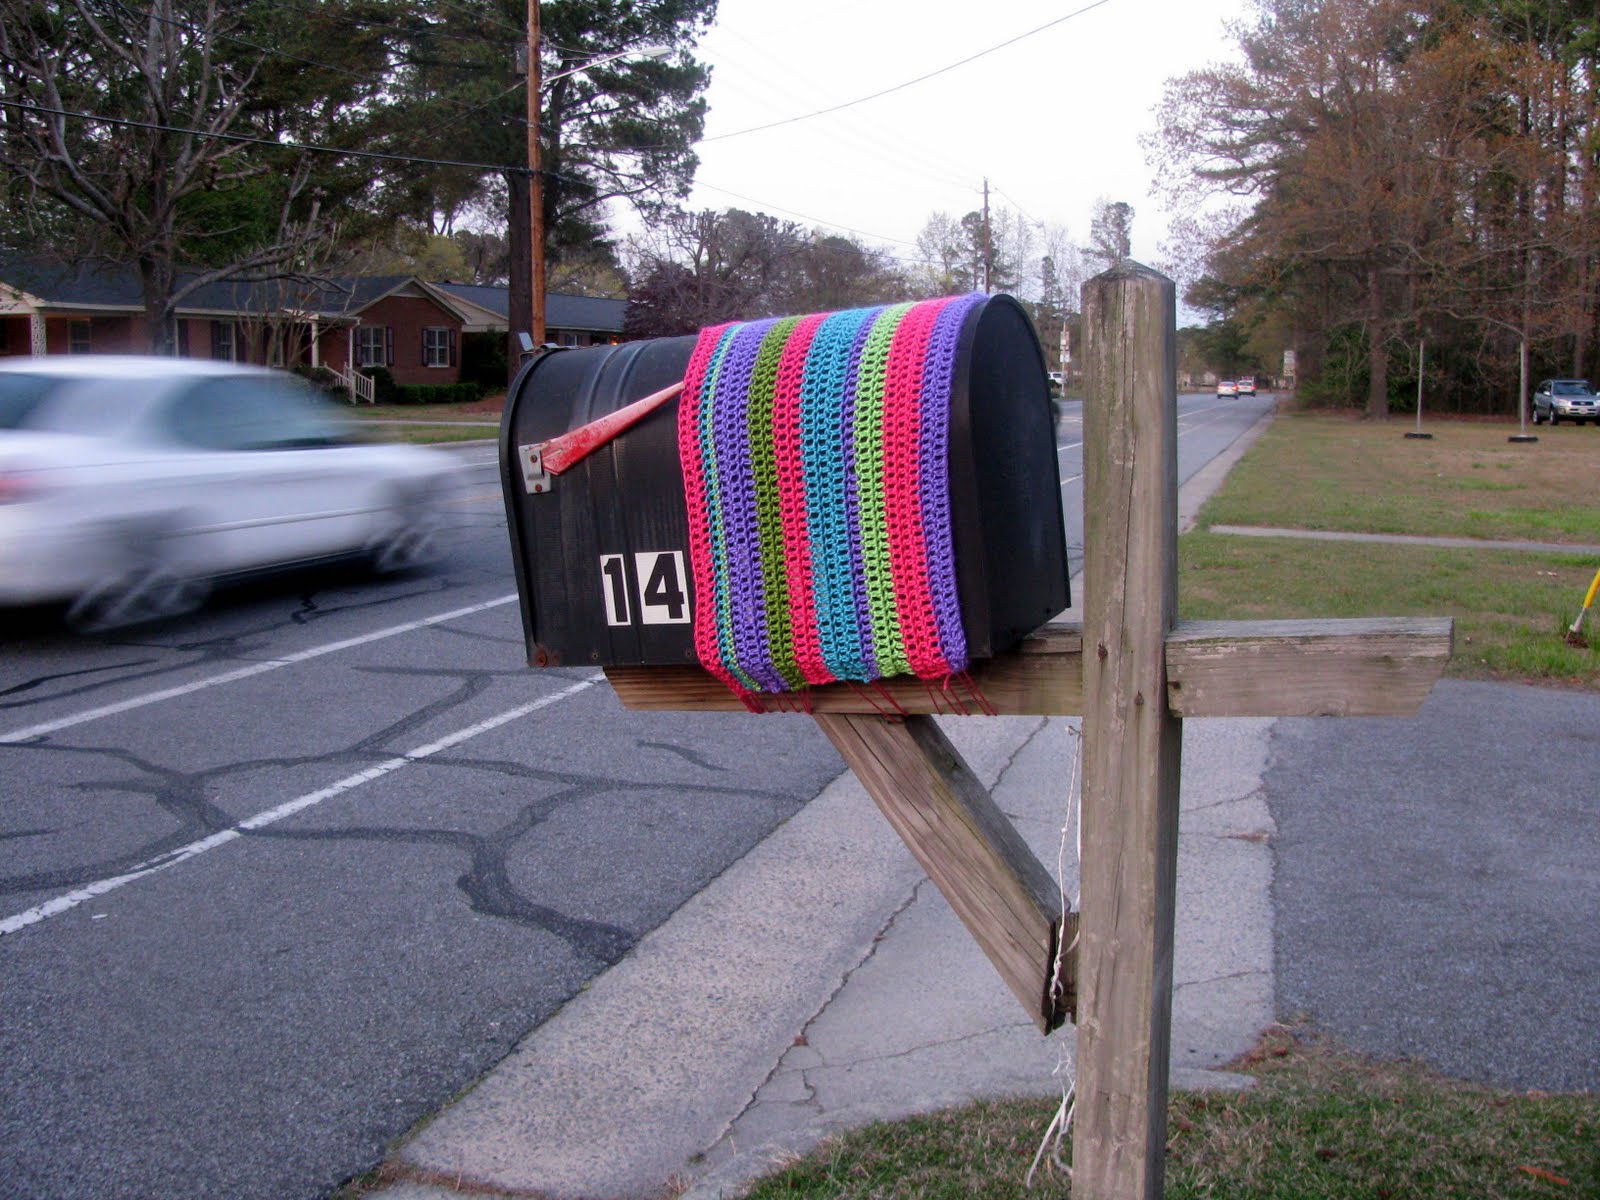
Find yourself grinning with glee every time you pass that way again and spot your colorful addition to the community.
(Yes, over 5 months later, it's STILL there!!!)
And that, my dear friends, brings you up to date with my crafting deeds through the month of March. Stay tuned for more to come!
Look, Rae! I blogged!
Wednesday, March 09, 2011
Productivity

I've been a busy gal lately and done a LOT of things. However, blogging isn't one of them!
Here is an update with lots of pics for your viewing pleasure. Most are projects that I started and finished in February. Click on name of each project to view the knitty gritty project details.
Nebula Wrap.

I started and finished a sweater for my hubby in February using Elizabeth Zimmerman's Seamless Saddle Shoulder Pullover pattern in her book Knitting Without Tears.
I call it "Beloved."


I have to say I am so happy with how it turned out.

This sweater was not without it's trials and tribulations.
There was some spinning in February. I spun alpaca...

...and some wool...

...and plied the two together.

There were smaller, less ambitious projects too. I crocheted a few water bottle covers to help my daughter with her AWANA missions project. She is making them to give to folks in exchange for donations which will all go to support children's programs in Nepal.


St. Patrick's Day is coming! I decided to make a crocheted Shamrock Garland.


This month, in anticipation of a little spring cleaning, I tried out two different patterns for Swiffer covers.

On the left is the Reversible Swiffer Sock and on the right is the Crochet Biffer Shrug.
Currently there are socks on one set of needles and and a cabled sweater in progress as well. However, I've spent the last two days doing a little sewing. I designed my own pattern for a reversible project bag.
This one is prize for a fellow participant in Ravelry's Nerd Wars. Her favorite colors are jewel-toned blue and green.


I made another one to donate as a door prize at Camp KIP in April.


I definitely see more of these bags in my future. I've really enjoyed sewing them!
Well, that pretty much sums up what I've been working on the last month or two. As you can see, my hands have been pretty busy! Now, if I could just be more consistent about writing my blog!
Wednesday, January 19, 2011
Swirlicious

Knitted cloth featured in yesterday's tutorial. Finished, but not blocked.
Do people bother blocking out their knitted dishcloths/washcloths??
Tuesday, January 18, 2011
TUTORIAL: I-cord or "Belly Button" Provisional Cast-on for Circular Knitting

When knitting something circular in shape, the initial cast on can be a bit fiddly. Working those first stitches with no knitting on your needles to manipulate can be a challenge. One solution is a variation on a provisional cast-on. You knit an i-cord out of waste yarn first and then drop the waste yarn and pick up the project yarn and start knitting your the pattern right on to the i-cord. Later, you remove the i-cord.
An online friend had some questions about the technique and I wanted to help her. This is my first-ever attempt at making a photo tutorial, so bear with me. Comments and suggestions are welcome.
For my demonstration I am knitting the Swirl Cloth, a circular dish cloth (or wash cloth) pattern available for free. Dishcloths are a great way to try out new techniques.
To start, take some waste yarn and knit a short length of i-cord. Your waste yarn should be a contrasting color from your project yarn. If you do not know how to knit i-cord, I highly recommend the video tutorial found on this page at KnittingHelp.com. I am using double pointed needles (DPN's). If you are not familiar with using DPN's, you can find a video tutorial here. The white kitchen cotton in my photos is my waste yarn. The blue yarn is my project yarn.
Since the pattern I am knitting calls for a cast-on of 8 stitches, I knit my i-cord with 8 stitches. This does not yield an attractive i-cord, but don't worry. It doesn't have to look good since it is only temporary and will be removed.
This is what it will probably look like after you have knit a few rows of i-cord.

The next step is to divide your stitches evenly over 3 or 4 needles. My DPN's came in a set of 5, so I chose to use 4 needles.


Now, drop the waste yarn (mine is white) and start working with the project yarn (mine is blue). Be sure to leave a decent "tail" on the working yarn because you are going to need it later. There is is nothing complicated about this step. You just pick up your project yarn and start knitting with it instead of the original waste yarn.


The first row you knit with your project yarn will essentially take the place of your cast-on row. My pattern tells me to cast-on 8 stitches, then knit around one time. So I knit a second row of 8 stitches in the blue. At this point, my pattern suggests putting a marker between each stitch, but you can imagine how incredibly fiddly and difficult that would be with only 2 stitches per needle...markers flying everywhere! So I will wait a few rows before adding the markers.
The pattern is very simple. It is just a repeat of the following two rounds:
*Knit to marker, yarn over, slip marker* for one round.
Knit next round.
Easy peasy, right? Well, not exactly at the beginning. That would mean on each needle for the first round of this stitch pattern I would have a k1, yo, k1, yo, then on to the next needle. Personally, when working with DPN's I do not like ending with a yo before before changing needles.
My solution is simple. On needle 1 I do the following: k1, yo, k1. But I stop there. Instead of doing the second yo after the second knit stitch on that first needle, I will do it at the beginning of the next needle. In other words while needle 1 has a k1, yo, k1 on it, needles 2,3,and 4 will have yo, k1, yo, k1. When I get back around to needle 1, I will start with the final yo of the previous round.
Below you can see me making a yarn over prior to knitting the stitches on one of my needles.

Now that I have more stitches on my needle, I decide to add the stitch markers. The pattern for doing so will be as follows: knit one stitch, knit the yarn over made in the previous round, place marker. Repeat.
Here is what it looks like from one angle.

And here it is flipped. You can see why some folk call this a "belly button cast-on." It looks like your project has a knitted umbilical cord attached.

Continue knitting in the round until you are ready to remove the provisional i-cord. You can wait until you finish your project or you can do it sooner.
Take the tail of project yarn from your cast-on and thread it through a darning needle. (I am using a CHIBI needle by Clover. They have a bent tip that helps in picking up stitches.) You are going to weave the tail through each of your first 8 stitches that you made in when you started knitting with your project yarn. If you are a really brave soul, you can remove the provisional i-cord first and then pick up your stitches. Because I am not fond of dropped stitches, I choose to pick up the stitches first, then remove my waste yarn.

You are going to do this all the way around, picking up each of the 8 stitches.

Here is a close-up showing where I put my needle. See the "v" of white yarn with two strands going into a loop of the blue. That is what you are looking for.

When you have gotten all the way around and you are certain you have all your stitches picked up, you can start removing the provisional stitches made by the waste yarn. If you need to snip it with scissors, please, PLEASE be very careful! It is very easy to accidentally cut your working yarn. I just used the tip of my CHIBI needle and gently pulled the white yarn out, snipping it's tail short to make removal easier.

Here is what it will look like as you begin to remove the waste yarn:


And now it is all gone. Do you have a gaping hole? Don't panic!

Take your darning needle with the tail and carefully thread it through your each of your picked up stitches again.

Gently, but firmly tug on that tail and draw those stitches together until your hole is all gone.

Give yourself a nice pat on the back. You've learned something new, and look at how tidy the center of your circular knitting is!

Be sure to securely weave in that tail on the underside of your knitting.
Subscribe to:
Posts (Atom)
LinkWithin
